.svg)
Basement Remodeling Checklist: 15 Essential Steps
By The Shed |
July 30, 2025
Transforming your basement into a functional space requires careful planning, budgeting, and attention to detail. This guide breaks down the process into 15 steps, covering everything from assessing moisture issues to adding final touches like flooring and lighting. Here's what you need to know:
- Define Your Goals: Decide how you’ll use the space - family room, office, guest room, etc.
- Set a Budget: Basement remodels cost $3,250–$56,000 on average. Include a 10–20% buffer for unexpected expenses.
- Check Permits and Codes: Ensure compliance with local building regulations, including egress windows and ceiling height.
- Address Moisture Issues: Inspect for dampness, leaks, or mold. Fix water problems and waterproof the space before moving forward.
- Plan Layout and Materials: Create a functional design, choose moisture-resistant materials like vinyl flooring, and plan for lighting and storage.
- Construction Phase: Frame walls, install insulation, and bring in professionals for electrical, plumbing, and HVAC work.
- Final Touches: Add flooring, trim, and custom features like built-ins or lighting. Schedule inspections to ensure everything meets code.
How to Finish a Basement From Start to Finish! (DIY Basement Renovation and Remodeling Guide)
Assess Your Basement and Fix Moisture Issues
Before diving into framing walls or laying down flooring, take a good look at your basement's current condition and deal with any moisture problems. A dry, solid foundation is key to a successful remodel. As the University of Minnesota Extension points out, "Finishing a basement without first dealing with the moisture problems can result in making health conditions worse and lead to significant damage as well". Tackling these issues early can save you from costly repairs down the road. Let’s break down the steps for inspecting and waterproofing your basement.
Measure and Inspect Your Basement
Start by measuring your basement thoroughly. Take note of room dimensions, ceiling heights, window placements, and where utilities like the furnace, water heater, and electrical panel are located. Pay close attention to areas with lowered ceilings due to ductwork or beams.
As you inspect, keep an eye out for moisture or structural concerns. Look for standing water, damp spots, or discoloration - especially where the floor meets the wall. White, chalky stains (efflorescence) on concrete surfaces often indicate water movement through the material. A musty smell can signal mold growth. Check wooden elements like support beams and joists for signs of rot. Flaking or peeling paint or wallpaper is another red flag. Rust or corrosion on metal items, such as pipes or window frames, might also point to moisture issues. Don’t forget to check for condensation on windows or plumbing, as well as any signs of insect or pest activity, which could indicate excess dampness. Document everything with photos and notes to discuss with contractors later.
Fix Water Problems and Add Waterproofing
If water problems are hidden behind finished walls, they’ll only get worse. Understanding how moisture enters your basement - whether through rain, groundwater, interior sources like unvented dryers, or humid air condensing on cooler surfaces - can help you choose the right waterproofing approach.
Start by improving exterior drainage. Make sure your yard slopes away from the house, dropping at least six inches over 10 feet. Gutters and downspouts should direct water at least 15 feet away from your foundation. For interior fixes, seal cracks with hydraulic cement and apply two coats of waterproof masonry cement to the walls.
Here’s a quick look at typical costs for professional waterproofing:
| Waterproofing Method | Cost Range |
|---|---|
| Epoxy crack filling | $800–$1,500 per crack |
| Exterior French drain installation | $10–$100 per linear foot |
| Exterior liquid membrane waterproofing | $3–$6 per square foot |
| Interior waterproof paint | $1–$8 per square foot |
| Minor leak repair | $250 per leak |
| Sump pump installation | $1,500–$2,500 |
If flooding is a concern in your area, a sump pump is a smart investment. Battery backup sump pumps can run for 7–10 hours before needing a recharge, and their batteries should be replaced every two years. Test your sump pump every three to four months to ensure it’s working properly.
Install Insulation and Improve Air Flow
Once moisture issues are under control, focus on insulation and ventilation to maintain a dry and comfortable space. These upgrades help regulate temperature and humidity, making your basement more livable.
To control humidity, use a dehumidifier to keep the relative humidity below 50%. Expect to spend between $800 and $2,000 on a dehumidifier. For ventilation, consult an HVAC professional or schedule a home energy assessment to determine your basement’s airflow needs. Ventilation system installations typically cost between $2,400 and $8,000, while inspections range from $100 to $300. Proper ventilation not only helps with moisture and mold prevention but also reduces harmful gases like radon and carbon monoxide. If radon or soil gas is a concern, address it before finishing your remodel.
Plan Your Layout and Choose Materials
With your basement now dry and insulated, it’s time to focus on designing a layout that works for your needs and selecting materials that can handle the unique challenges of a basement environment. Thoughtful planning at this stage not only helps you avoid costly mistakes but also ensures your space is functional, comfortable, and compliant with local building codes.
Design Your Floor Plan
Start by deciding how you want to use the space. Will it be a home theater, a storage area, a playroom, or maybe a mix of these? Your choice will determine everything from where walls go to what kind of electrical setup you’ll need. For example, creating distinct zones - like a cozy office nook or a play area - can help you make the most of the space. Be sure to think about how people will move between these zones; clear pathways without obstacles are key for easy navigation.
If you’re planning an office, choose a quiet, well-lit corner. For long-term flexibility, consider adding features like movable dividers or multi-purpose furniture. This way, your basement can evolve as your needs change.
Another important consideration is accessibility for maintenance. Installing a drop ceiling can make it easier to reach plumbing or electrical systems in the future. Once your layout is finalized, you can shift your attention to selecting materials that are well-suited for basement conditions.
Choose Materials That Handle Moisture
Basements are notorious for moisture and humidity, so picking the right materials is crucial. When it comes to flooring, you’ll want something durable and moisture-resistant. Here’s a quick comparison of some popular basement flooring options:
| Material | Cost | DIY Friendly | Waterproofing | Durability | Best For |
|---|---|---|---|---|---|
| Luxury Vinyl Plank (LVP) | Moderate-High | Yes | High | High | Living areas, wood-look style |
| Ceramic & Porcelain Tile | High | No | Excellent | High | Bathrooms, high-traffic zones |
| Rubber Flooring | High | No | Excellent | High | Gyms, play areas |
| Vinyl Tiles | Low-Moderate | Yes | Moderate | Moderate | Budget-friendly utility areas |
| Cork Flooring | Moderate | Yes | Moderate | Moderate | Comfortable living spaces |
Luxury Vinyl Plank (LVP) is a favorite for its realistic wood appearance, waterproof nature, and ease of installation, though it’s pricier and can be prone to scratches. For areas that need extra durability and waterproofing, ceramic or porcelain tiles are excellent choices, though they can feel cold underfoot.
Beyond flooring, opt for moisture-resistant drywall and consider closed-cell spray foam for insulation. These materials not only help with moisture control but also add an extra layer of protection. Using eco-conscious options like breathable membranes or non-toxic sealants can further enhance the longevity of your basement by allowing walls to dry out while keeping moisture at bay.
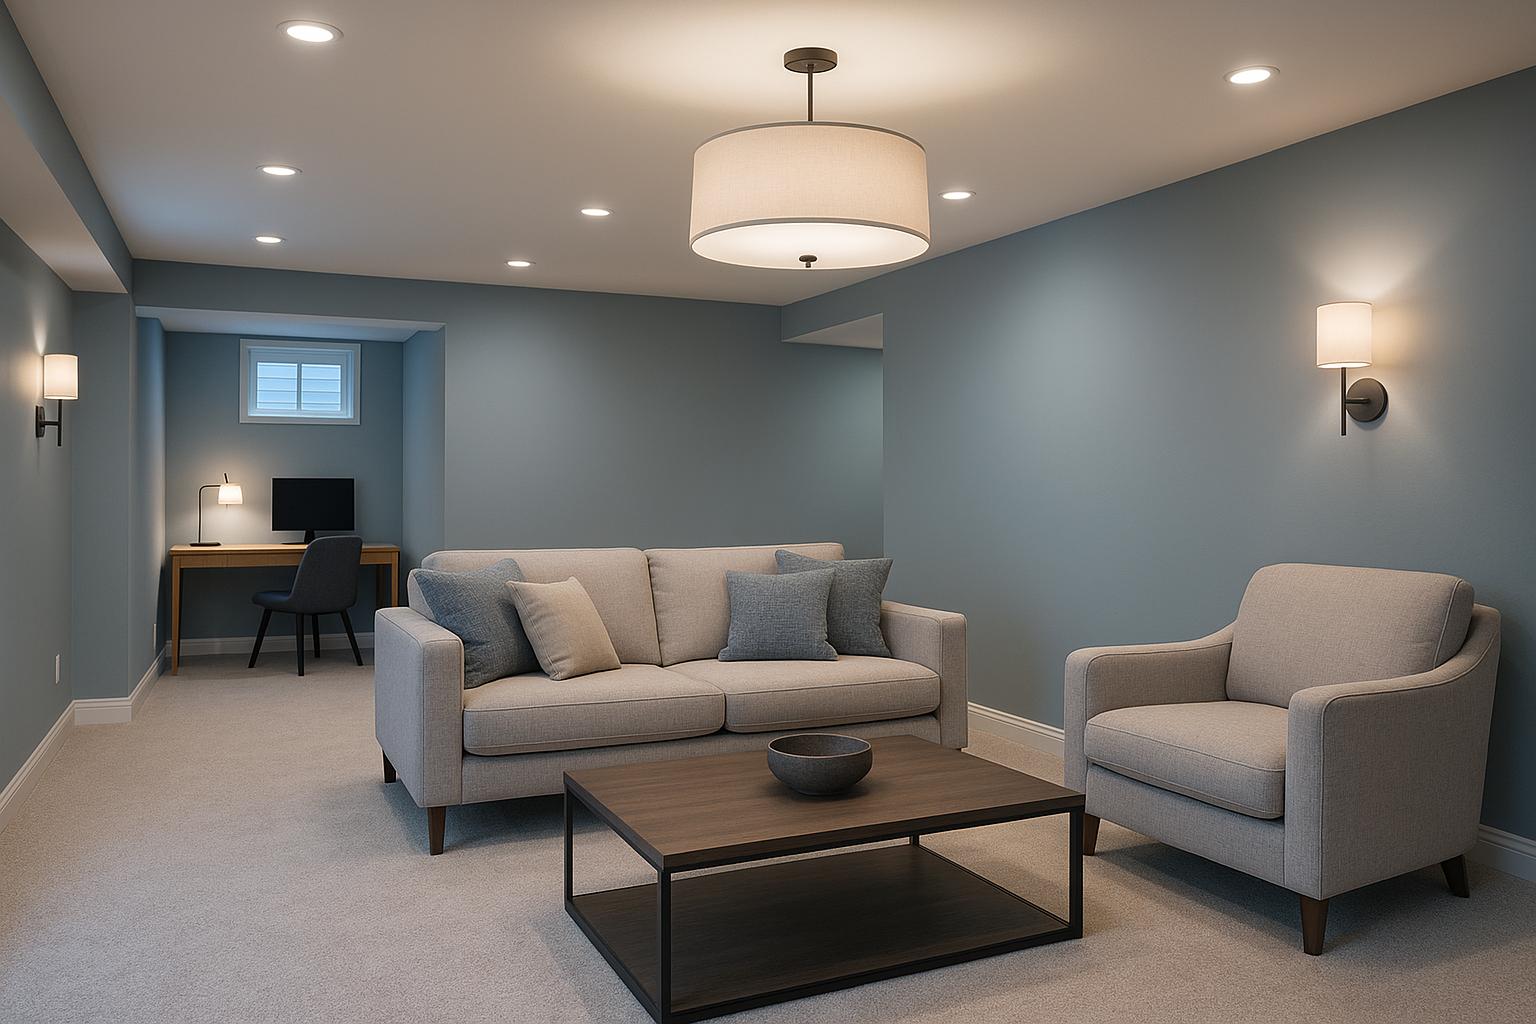
Pick Colors, Lighting, and Storage Options
Basements often lack natural light, so your choice of colors and lighting becomes critical in creating a bright, inviting atmosphere. Go for lighter, neutral shades like white, cream, or pale gray to make the space feel more open and airy. Paint finishes like semi-gloss or satin are particularly useful since they’re easy to clean and can resist moisture.
For lighting, layer different types to achieve a balanced look. Combine recessed ceiling lights for general illumination with floor lamps or table lamps to create a cozy ambiance. LED strips along stairs not only enhance safety but also add a modern touch. If your basement has no windows, you can install a false-lighted window to mimic natural light.
Storage is another essential element. Built-in storage solutions - like shelves under stairs or cabinets along walls - help you keep the space organized without taking up valuable floor space. Think about what you’ll need to store: media shelves for an entertainment area or craft storage for a hobby space. Pairing smart storage with well-placed lighting can make your basement both functional and visually appealing.
sbb-itb-5ac1217
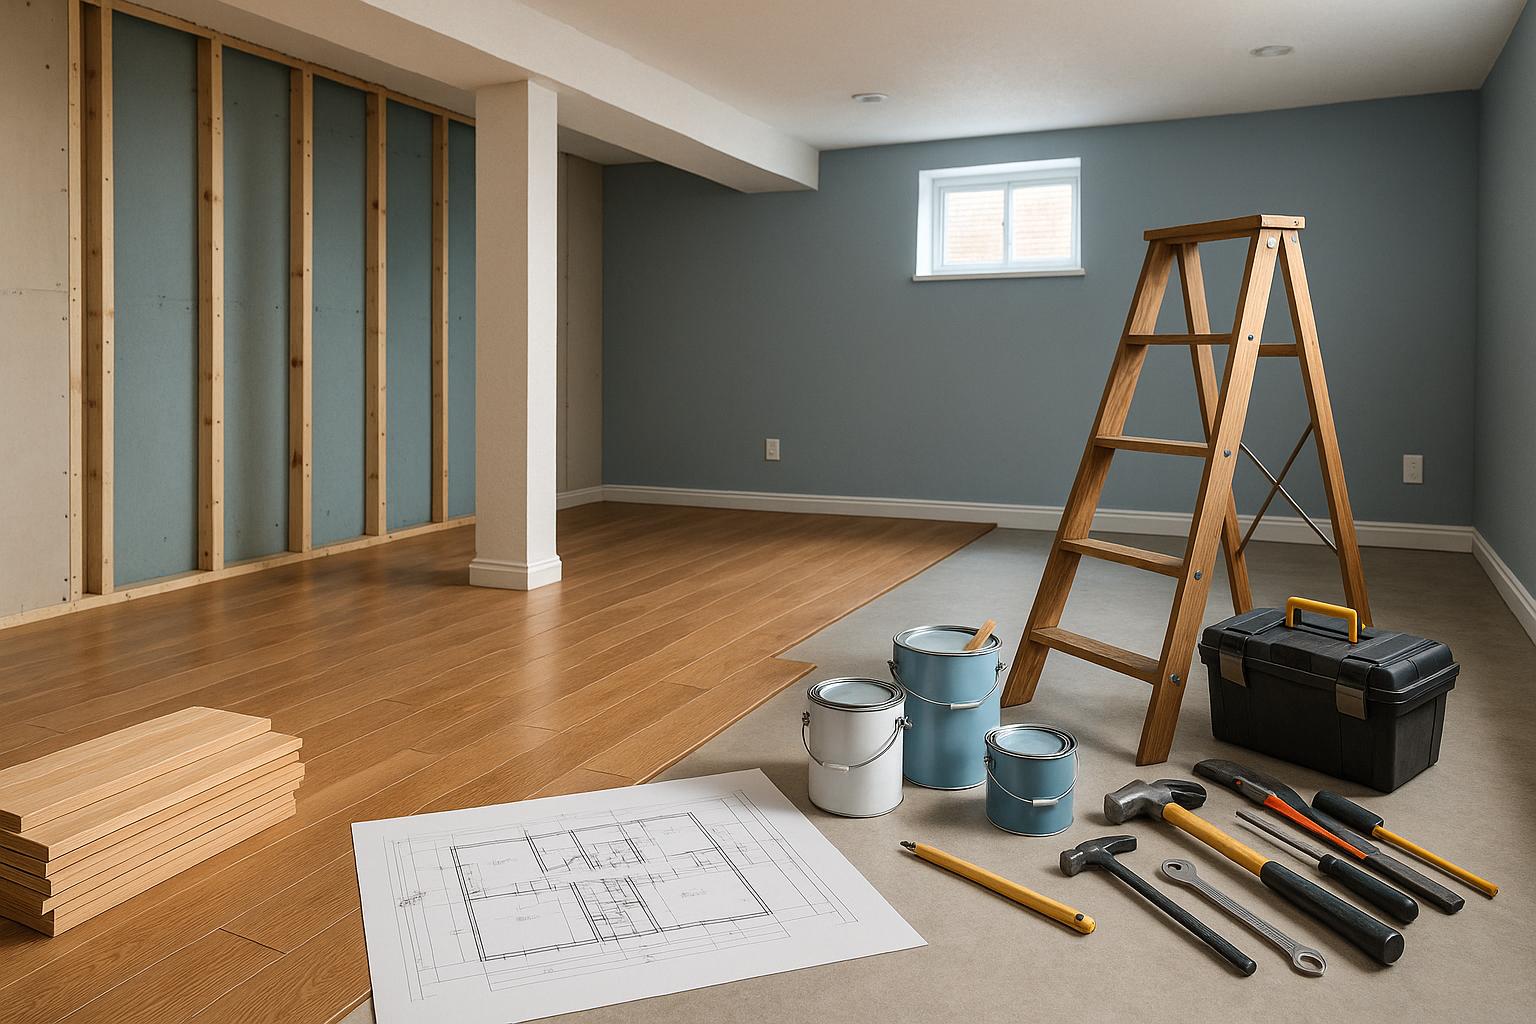
Complete the Main Construction Work
Once you’ve finalized your layout and chosen materials, it’s time to bring your plans to life. The main construction work turns your ideas into a functional basement, focusing on the structural framework, essential systems, and wall finishes. Each step ensures your basement is safe, durable, and up to code.
Frame Walls and Install Insulation
Framing interior walls is what transforms your basement from an open space into defined rooms. Start by sealing the foundation walls with a masonry waterproofing product - this helps keep moisture from seeping through the concrete. After that, attach 2-inch extruded polystyrene (XPS) foam board insulation using a foam-specific construction adhesive.
Here’s what you’ll need: tools like a chalk line, framing nailer, circular saw, powder-actuated nail gun, miter saw, levels, and safety gear. For materials, gather pressure-treated 2x4s for the bottom plates, standard 2x4s for top plates and studs, and proper fasteners.
- Mark wall locations with chalk lines and a level.
- Cut the bottom and top plates to size and space the studs 16 inches apart (on center).
- Build the walls slightly shorter - about 1/4 inch less than the floor-to-joist height - for easier installation.
- Use adhesive and powder-actuated fasteners to secure plates every 6 feet. Check that the walls are plumb every 4 feet and attach the top plate to the joists.
For inside corners, overlap the last board on one wall halfway past the connecting wall to create solid fastening and drywall attachment points. Add drywall backers at outside corners, intersections, and along walls parallel to joists to ensure a proper surface for hanging drywall later.
Once the walls are framed and insulated, it’s time to move on to the systems that bring your basement to life.
Install Electrical, Plumbing, and HVAC Systems
When it comes to electrical, plumbing, and HVAC systems, it’s best to call in licensed professionals to ensure everything meets code.
Electrical Work: A licensed electrician should evaluate your current electrical setup and make necessary upgrades. This might include upgrading the panel, adding outlets and switches, and wiring lighting circuits for your basement.
Plumbing: If your plans involve moving or adding plumbing fixtures, consult a plumber early in the process. They’ll handle tasks like relocating pipes, upgrading water heaters, and installing new water and drain lines. Proper sizing and venting of these lines are critical to avoid backups and maintain water pressure.
HVAC: Heating and cooling systems must be carefully installed to meet both manufacturer guidelines and local codes. Proper sizing - based on methods like the ACCA Manual S - ensures the system runs efficiently without driving up energy costs or creating safety risks.
When framing around obstacles like electrical panels or plumbing, make sure to leave proper clearances. Use headers to support weight above doorways or large openings, and ensure that framed areas around electrical panels comply with code requirements for access.
Hang Drywall and Paint
With the systems in place, it’s time to finish the walls. Start by installing moisture-resistant drywall horizontally, fastening it every 12 inches with screws set just below the surface.
Pay close attention to the details:
- Inside corners: Use proper taping and mudding techniques for clean seams.
- Outside corners: Install metal corner beads to protect against damage and create sharp edges.
- Seams and screw holes: Apply joint compound in three thin coats, sanding lightly between each coat for a smooth finish.
To protect against basement humidity, install a code-compliant vapor barrier. When it’s time to paint, choose low-VOC paints to keep indoor air fresh. Semi-gloss or satin finishes are ideal - they resist moisture and are easy to clean. Start with a high-quality primer, then follow with two coats of paint for a smooth, durable finish.
Taking the time to carefully frame, insulate, and finish your basement walls ensures a polished look and a space you’ll enjoy for years to come.
Add Flooring and Final Features
With the walls complete and systems in place, it's time to focus on the finishing touches that bring your basement remodel to life. These final steps require careful attention to detail to ensure everything looks polished and functions seamlessly.
Install Flooring and Trim Work
Before laying down flooring, preparation is key to achieving long-lasting results. Start by ensuring the concrete subfloor is level and thoroughly moisture-tested. Follow the manufacturer’s guidelines for leveling, priming, and installing a vapor barrier. Check that the moisture levels fall within acceptable ranges and allow the flooring materials to acclimate as recommended.
Choosing the Right Flooring
Basements often face challenges like moisture, temperature shifts, and durability concerns. When selecting flooring, consider factors such as cost, water resistance, and longevity. Luxury vinyl and ceramic tile are excellent options for their moisture resistance, while engineered hardwood offers a natural look with less risk of warping.
If your basement is prone to dampness or flooding, stick with materials like vinyl or tile. For those who prefer carpet, opt for synthetic fibers like nylon or polyester, paired with a moisture-resistant pad. These materials are better at resisting mold and mildew compared to natural fibers.
Installation Tips
Before installing the flooring, check the baseboards. The new flooring should fit underneath with proper expansion gaps. If space is tight, remove the baseboards and plan to install quarter-round molding after the flooring is in place. You may also need to trim door casings to ensure the flooring fits properly.
Add Lighting and Custom Features
Lighting and custom features are what truly transform your basement into a space that feels both functional and inviting. For lighting, consider layering ambient, task, and accent lighting to create a balanced and versatile setup. Low-profile fixtures work well for basements with lower ceilings.
Custom features can add both style and practicality. Popular additions include built-in entertainment centers for media equipment, wet bars with mini-fridges and wine storage, or custom shelving that fits snugly into alcoves or around structural obstacles.
Energy Swing Total Basement Finishing offers creative solutions for common basement challenges. For example, their column wraps can turn support beams into elegant design elements with crown molding at the top and base. They also offer a range of door options, such as glass French doors, which can make your basement feel more connected to the rest of your home.
"Finishing touches are the key to transforming a basement remodel from functional to extraordinary...They ensure that every corner of your newly remodeled space reflects both beauty and purpose, turning it into a seamless extension of your home."
Trim Work Details
Baseboards and crown molding are essential for a polished look. These elements hide gaps between the flooring and walls while adding a layer of sophistication. Select trim styles that align with the rest of your home’s design for a cohesive appearance.
Pay close attention to corners and transitions, especially where different materials meet. Proper caulking and finishing can make the difference between a project that looks amateur and one that feels professionally done.
Schedule Final Inspections
Once the flooring and finishing touches are done, it’s crucial to schedule final inspections to ensure everything meets code. Building departments often require several days' notice for inspections, so plan ahead. Before the inspector arrives, make sure all work is complete and accessible, and have your permits and approved plans ready for review.
After passing inspections, do a thorough walkthrough to test all systems - check for any minor issues like loose trim or paint touch-ups. Address these small details before officially wrapping up your basement remodel.
Your Complete Basement Remodeling Checklist
Remodeling your basement can be a big project, but having a clear checklist can help you stay organized and avoid costly mistakes. This guide breaks down the 15 key steps, from planning to final inspections, so you can tackle your project with confidence.
"It's important before you begin your renovation to plan ahead. Be prepared for the unexpected and remember that poor planning and communication often leads to mistakes and delays." - Damla Turgut, Founder and Creative Director at Otto Tiles & Design
Planning Phase
Start with a solid foundation - figuratively speaking. Here's how to prep for success:
- Define Your Goals: Decide how you'll use the space. Will it be a family room, a home office, or maybe a rental unit?
- Set a Budget: Establish a realistic budget, and include a 10–20% buffer for surprises.
- Research Permits and Codes: Check with your local building department to understand permits and safety regulations.
Assessment and Moisture Control
Before diving into construction, assess your basement and address potential issues:
- Measure and Inspect: Take note of dimensions, ceiling height, and any structural elements like beams or posts.
- Fix Moisture Issues: Solve any water problems and apply waterproofing solutions before moving forward.
- Add Insulation and Ventilation: Use closed-cell spray foam or rigid foam insulation for walls, and ensure proper airflow to keep the space comfortable.
Design and Material Selection
This step is all about turning your vision into a workable plan:
- Design the Layout: Create zones for different functions while leaving room for essential systems and meeting safety requirements like egress windows.
- Choose Durable Materials: Opt for moisture-resistant options like luxury vinyl flooring and mold-resistant drywall.
- Plan Lighting and Storage: Incorporate layered lighting (ambient, task, and accent) and smart storage solutions to maximize functionality.
Construction Phase
With your plans in place, it's time to bring them to life:
- Frame and Insulate: Build interior walls with metal or wood framing and install proper insulation.
- Install Systems: Bring in professionals to handle electrical, plumbing, and HVAC installations.
- Hang Drywall and Paint: Use moisture-resistant drywall, then prime and paint under the right conditions.
Finishing Touches
This is where your basement really comes together:
- Install Flooring and Trim: Prepare the subfloor and test for moisture before laying down flooring.
- Add Features: Install lighting fixtures, built-ins, and custom touches to enhance the space’s functionality and style.
- Schedule Final Inspections: Book inspections ahead of time and do a final walkthrough to ensure everything meets your expectations.
"Assess and address moisture and structural issues before starting your basement renovation to ensure a safe and stable environment." - R&S Basements
Staying Organized Throughout
Keep everything on track by using project management tools, saving contracts and permits, and holding regular check-ins with your contractors. Create a timeline with key milestones and celebrate small victories along the way. Flexibility is key - unexpected delays or issues can happen, so have a backup plan ready.
FAQs
How can I effectively prevent moisture problems in my basement before starting a remodel?
To keep your basement dry and free from moisture problems, begin by sealing any cracks in the foundation to stop water from seeping in. Adding vapor barriers to the walls and floors can also help reduce dampness and guard against moisture buildup. Make sure your home’s drainage system - like gutters and downspouts - directs water away from the foundation effectively. Using a dehumidifier is another great way to manage indoor humidity levels, while proper ventilation can help minimize moisture from daily activities such as cooking or doing laundry. These measures will help ensure your basement stays dry and ready for remodeling.
What steps should I take to ensure my basement remodel meets local building codes, especially for egress windows and ceiling height?
To make sure your basement remodel meets U.S. building codes, you’ll need to pay special attention to egress windows and ceiling heights. Egress windows are crucial for safety, especially if the basement will be used as a bedroom or living area. They must have a minimum net clear opening of 24 inches in height and 20 inches in width, with a total opening area of at least 5.7 square feet. Additionally, the bottom of the window can’t be more than 44 inches above the floor.
When it comes to ceiling height, most building codes require at least 7 feet 6 inches for the main egress route. However, since requirements can vary depending on your location, it’s always a good idea to check with your local building department for the exact standards in your area.
What are the best flooring and insulation options for a basement to manage moisture and humidity?
When selecting flooring for your basement, luxury vinyl plank or tile and ceramic or porcelain tiles stand out as top options. These materials are built to withstand the higher humidity levels common in basements while offering a stylish finish. Their durability and resistance to moisture make them a practical and attractive choice.
For insulation, consider using rigid foam boards or closed-cell spray foam. Both options excel at keeping moisture at bay and provide excellent thermal insulation. They also help reduce the risk of mold and mildew, creating a basement space that's not just energy-efficient but also comfortable to use.